The Outdoor Apothecary is reader-supported. When you buy through links on our site, we may earn an affiliate commission. Learn more
Autumn always makes me want to slow down and create something by hand using simple, natural materials.
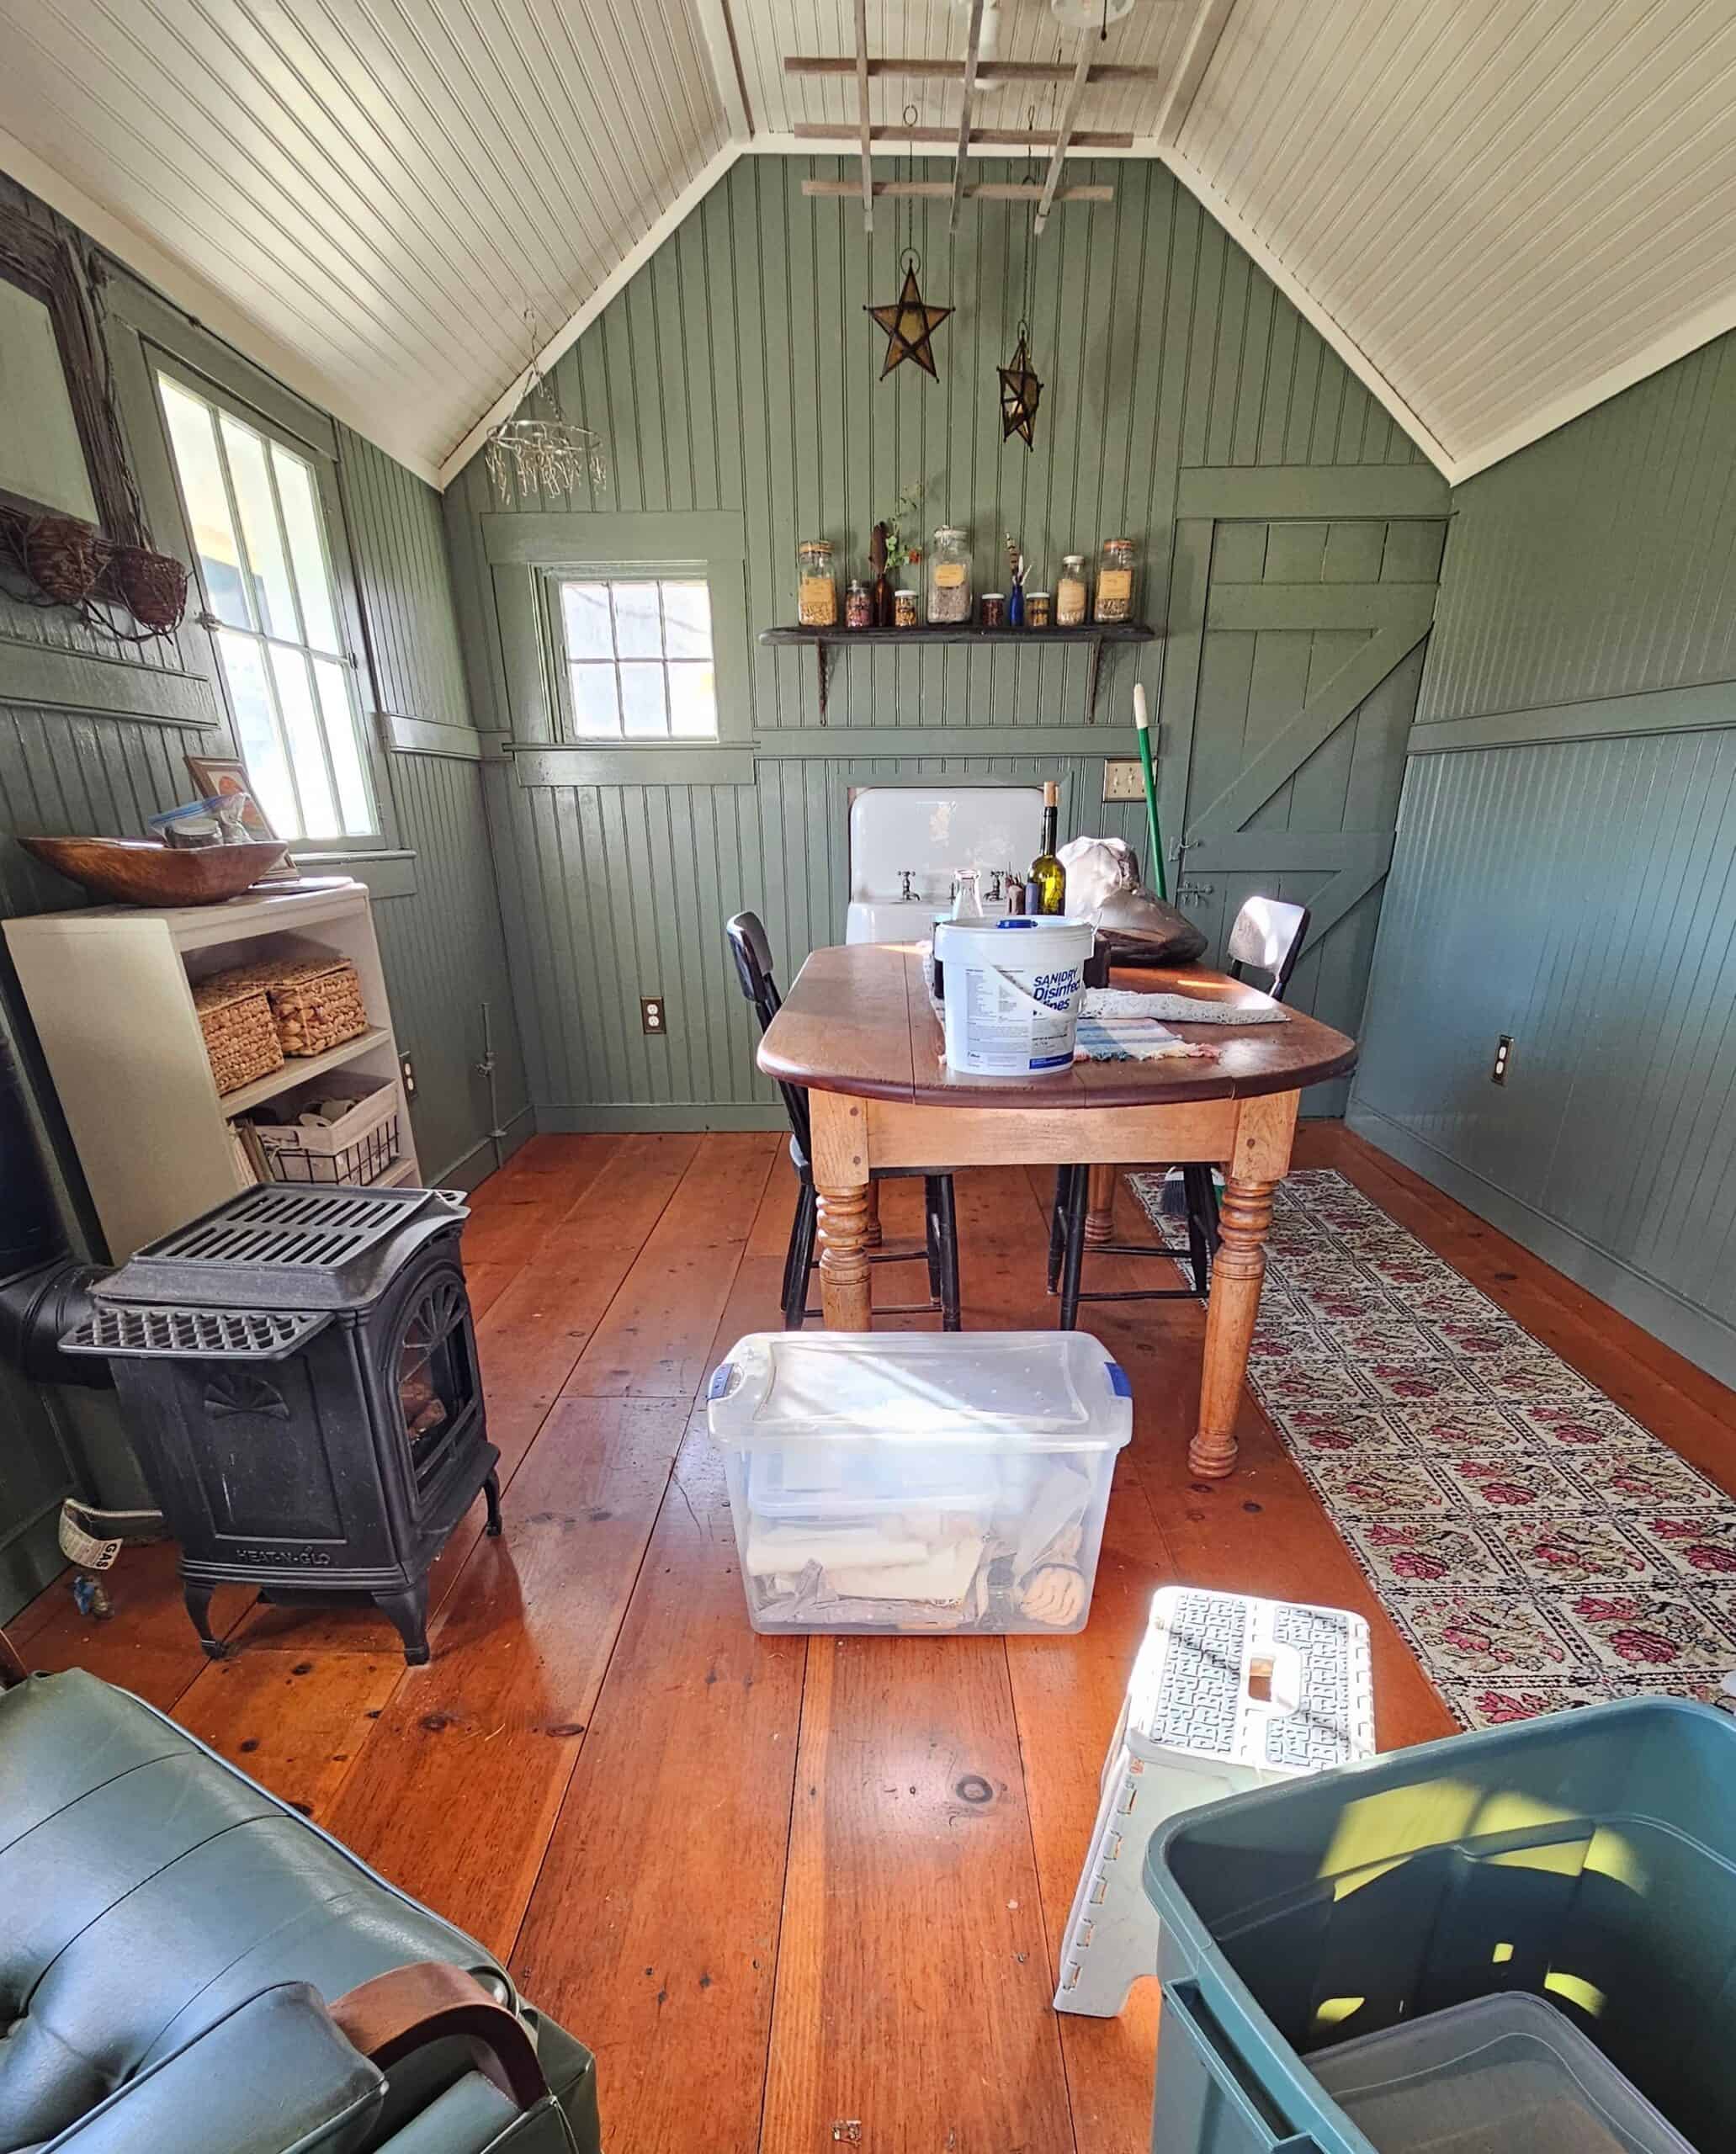
New art/nature studio[/caption]
I recently set up a nature and art studio on our new property in a small building that was once the bathhouse for our historic home. Indoor plumbing was not installed in the house until the 1990s, so this little building is an interesting part of the property’s story. It now feels like the perfect place for making nature-inspired art and seasonal crafts.
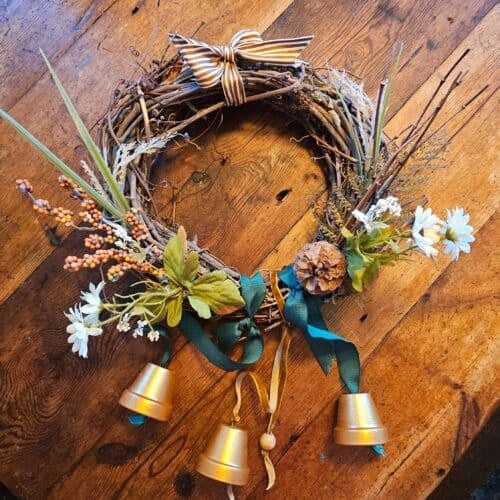
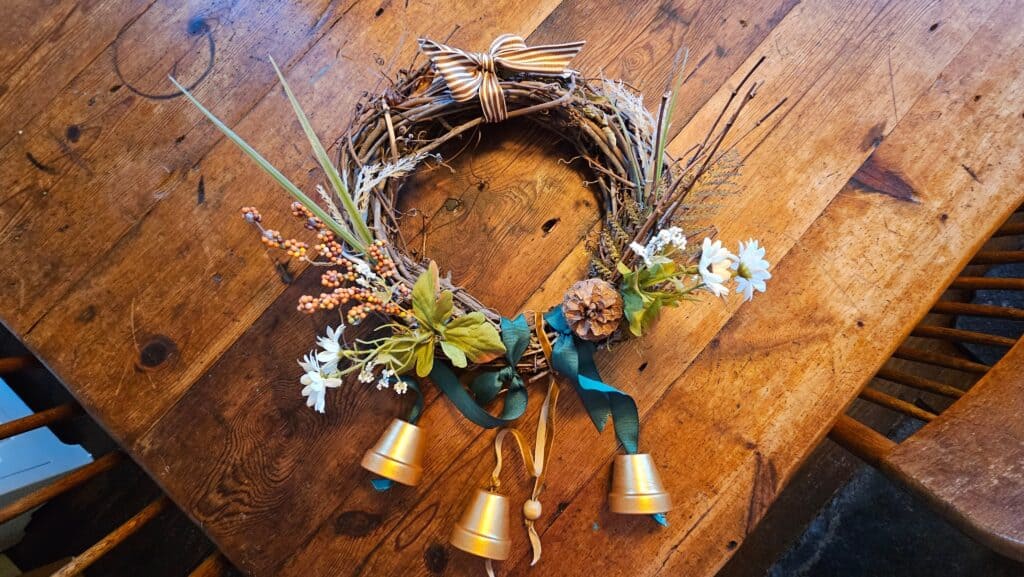
For an October project, I decided to make witches bells to hang on the doors of my studio. I was inspired by this DIY witches bells video, which uses miniature terracotta pots in place of metal bells. I loved the idea because the little pots are inexpensive, easy to decorate, and can be made to resemble aged brass bells.
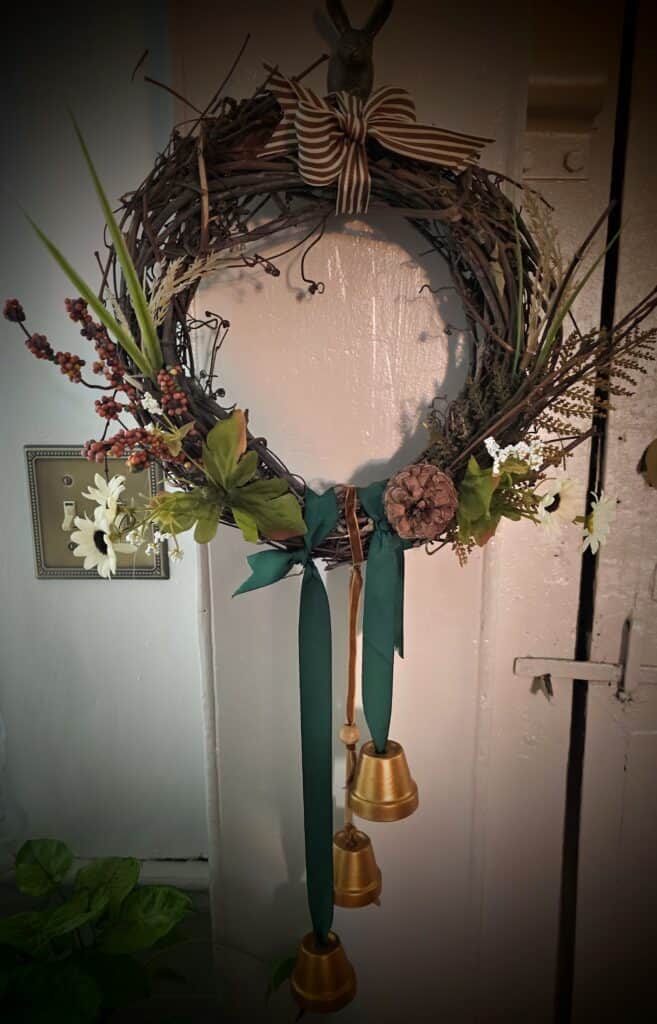
What Are Witches Bells?
Witches bells are decorative bells that are usually hung near a doorway or entrance. In modern folk-magic traditions, their ringing is associated with protecting the home, welcoming positive energy, and clearing away unwanted influences.
You do not need to follow a particular spiritual tradition to make or enjoy them. They can simply be a beautiful handmade decoration and a gentle reminder to pause as you cross a threshold. I especially like the idea of hanging them on a studio, garden shed, or other creative space.
The bells in this project are made from small terracotta flowerpots. A bead tied inside each pot acts as the clapper and makes a soft sound when the door moves. You can also use actual bells if you prefer.
Supplies for Making Witches Bells
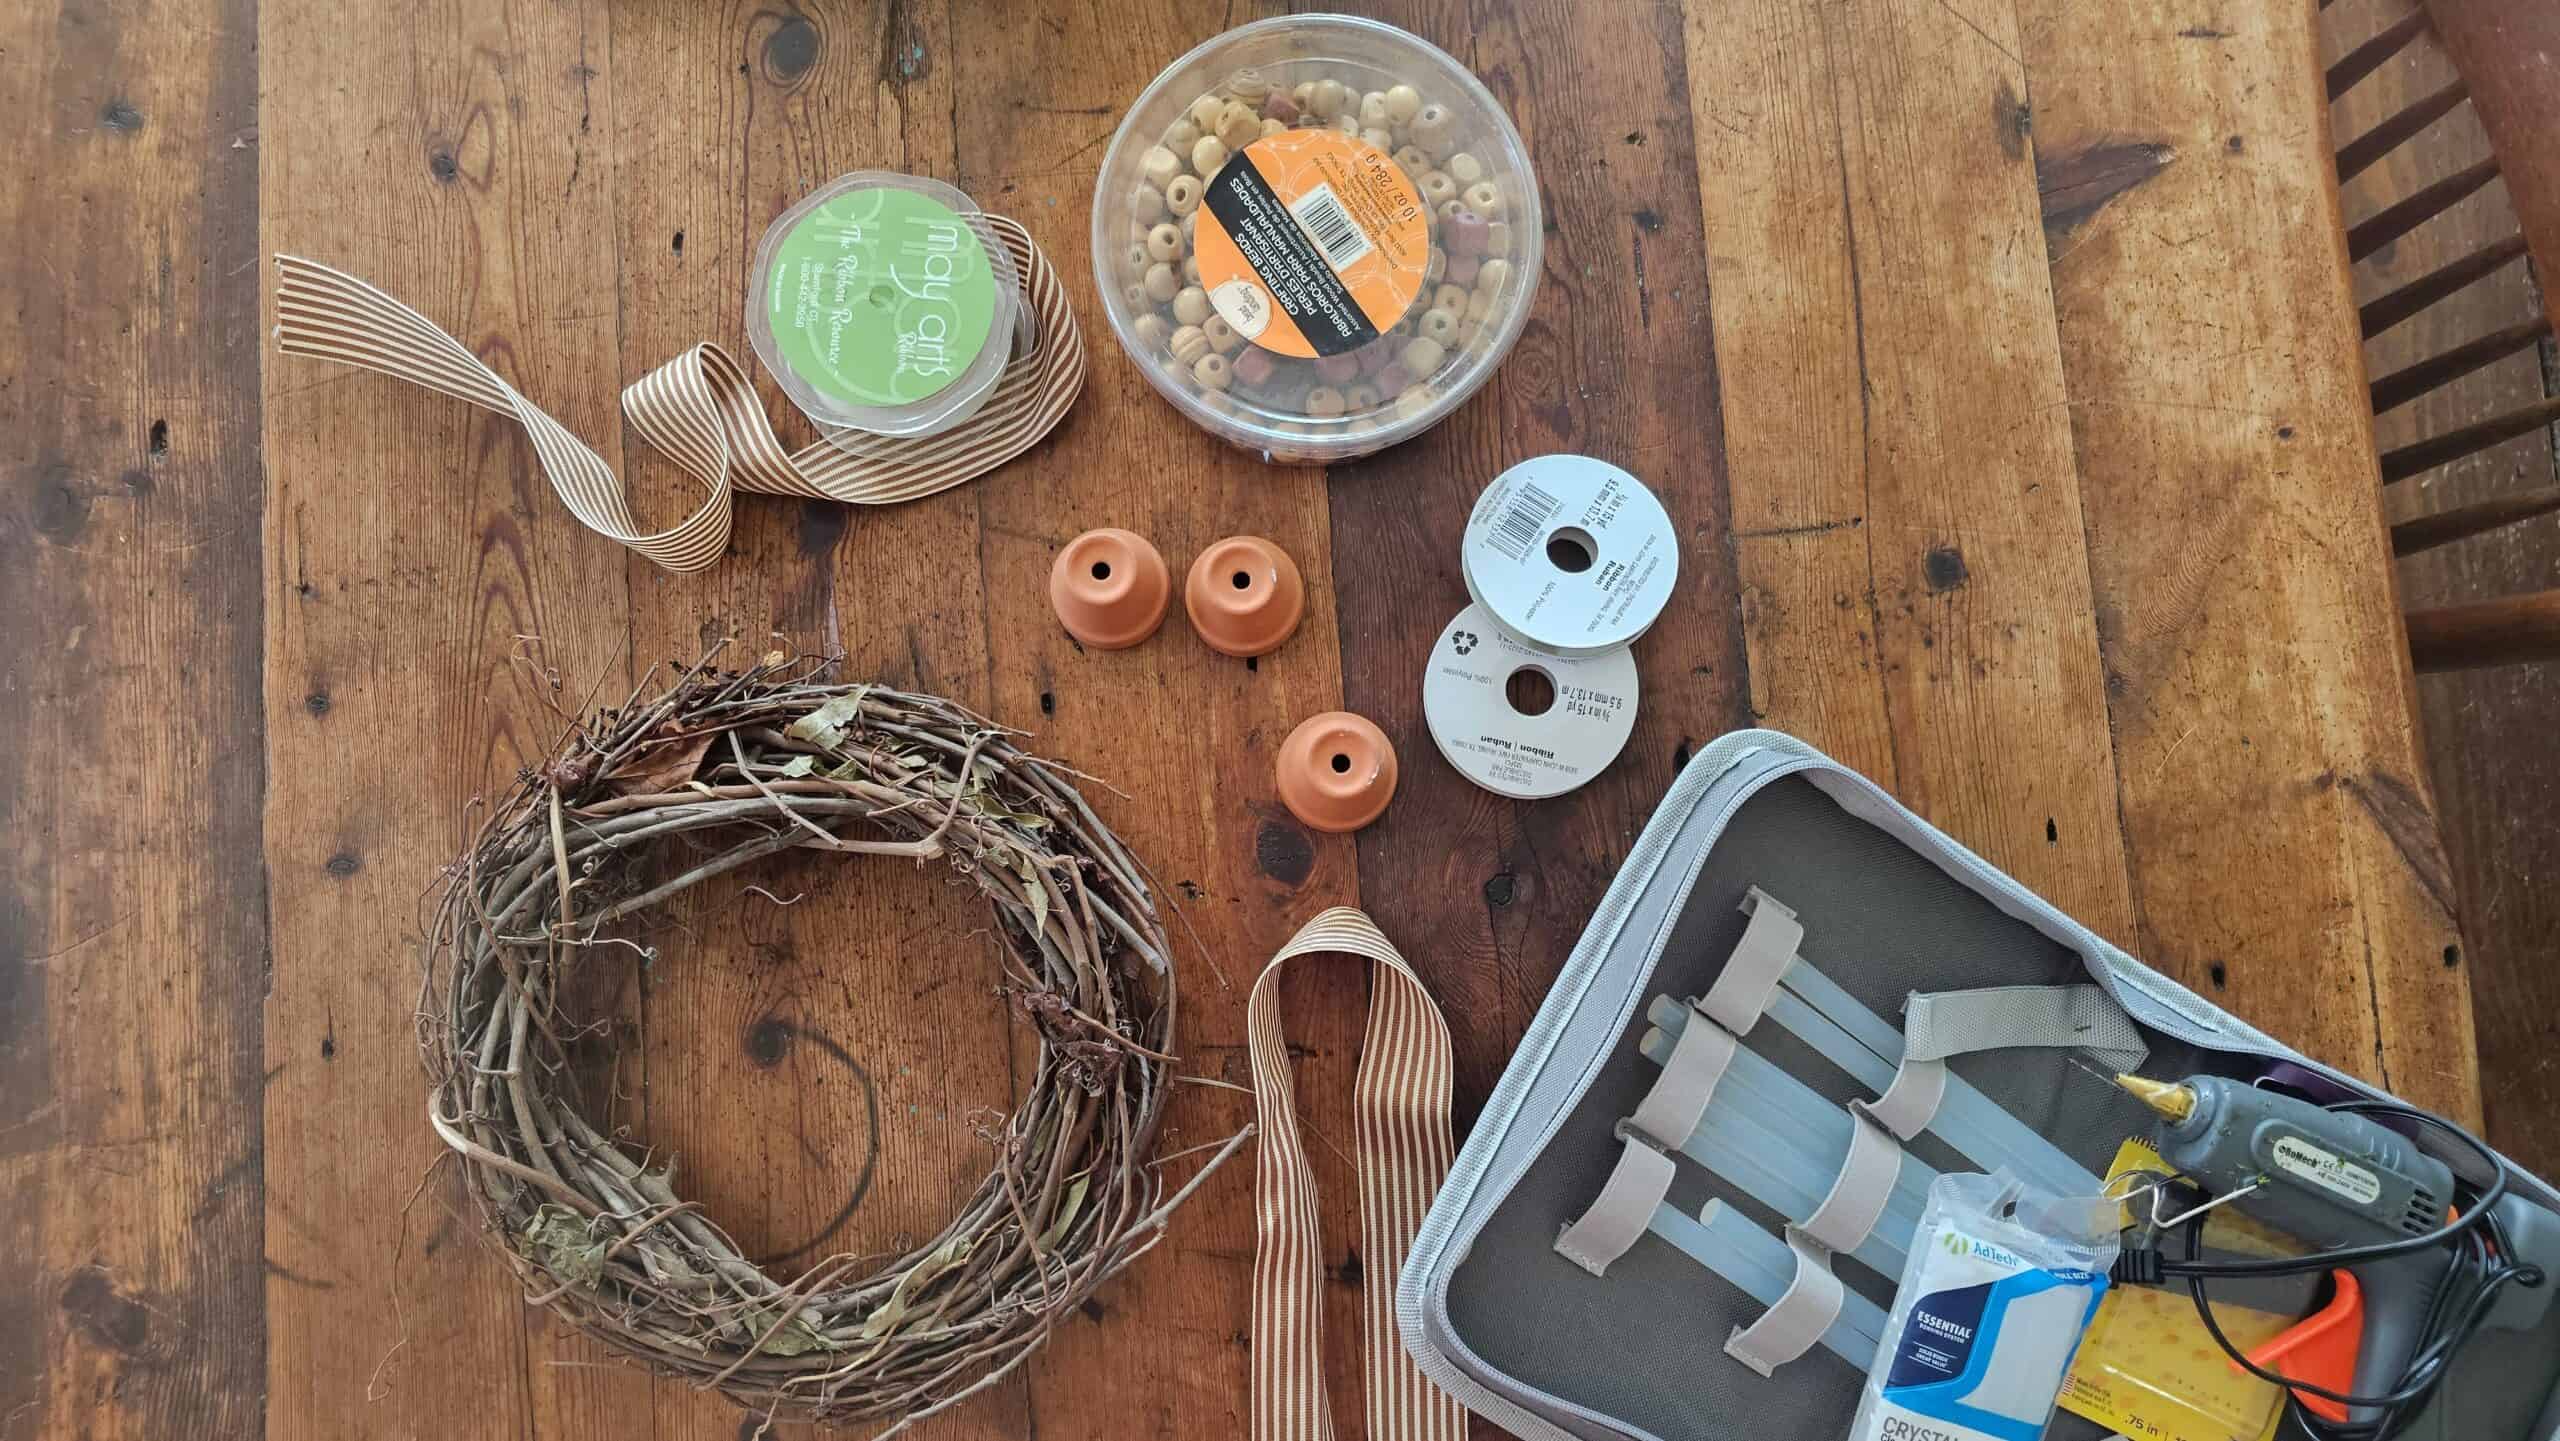
- Small grapevine wreath
- Three miniature terracotta pots
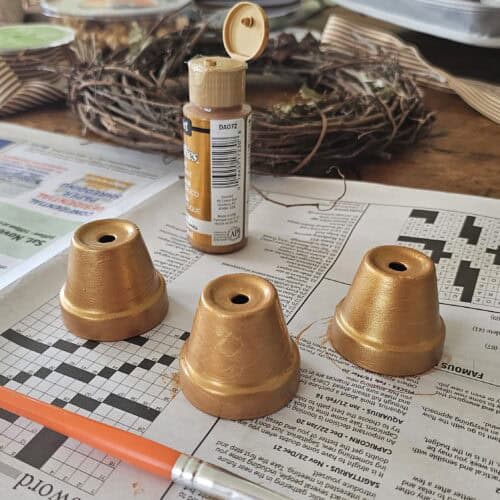
- Antique brass, bronze, or metallic gold acrylic paint
- Small paintbrushes
- Three wooden beads
- Several colors and patterns of ribbon
- Artificial or dried flowers
- Hot glue gun and glue sticks
- Scissors
- Clear sealer, optional
Choose colors and decorations that fit the season or the place where your bells will hang. For fall, I would choose rust, mustard, olive green, brown, burgundy, cream, or black.
Easy Material Substitutions
One of the best things about this craft is how easily it can be adapted to what you already have. There is no need to purchase every material on the supply list.
- Mini terracotta pots: Use actual brass, copper, iron, or jingle bells instead. Thrifted bells and bells removed from old holiday decorations work well. If you use real bells, simply tie them to the ribbons and skip the painting and bead-clapper steps.
- Grapevine wreath: Substitute a metal craft ring, wooden embroidery hoop, curtain ring, small branch wreath, or circle made from flexible vines.
- Wooden beads: Use metal beads, buttons, old jewelry pieces, or any bead large enough to strike the inside of the pot.
- Ribbon: Try strips of leftover fabric, lace, velvet, yarn, twine, raffia, leather cord, or narrow strips cut from an old garment.
- Artificial flowers: Use dried herbs, grasses, flowers, seed heads, evergreen sprigs, or preserved leaves. Make sure natural materials are completely dry before adding them.
- Add other nature items: Add dried orange slices, dried apples, rose hips, acorns, pinecones, cinnamon sticks, nutshells, or other responsibly gathered natural materials.
- Paint: Leave the pots unpainted for a rustic look, or use black, copper, bronze, cream, or another color that suits your home.
- Painted details: Decorate the pots with pressed flowers, decoupage paper, permanent markers, tiny charms, or leave them plain.
- Hot glue: Use thin craft wire, floral wire, strong twine, or securely tied ribbon where practical.
You can also combine materials. Three mismatched thrifted bells would give the wreath an old-fashioned, collected-over-time appearance. I always prefer using what I already have or can find secondhand, since those small imperfections often give a handmade project the most character.
How to Make Witch’s Bells
Before beginning, protect your work surface and plug in your hot glue gun. If children are helping, an adult should handle the hot glue and any sharp tools.
Step 1: Paint the Terracotta Pots
Turn the miniature flowerpots upside down and paint the outside of each one with antique brass, bronze, or metallic gold paint. The goal is to make the pots resemble small, aged bells.
Apply a second coat if needed, allowing the paint to dry between coats. You can leave a little terracotta showing through if you want a more weathered appearance.
Step 2: Add Designs or Meaningful Words
Once the paint is dry, decorate the pots with small painted details if you want (I left mine plain). You might add leaves, vines, stars, moons, flowers, protective symbols, or simple patterns.
You can also paint a short blessing or meaningful word on each bell, such as peace, protect, welcome, create, grow, or dream. This is an easy way to personalize the witch’s bells for your home or creative space.
Step 3: Make the Bell Clappers
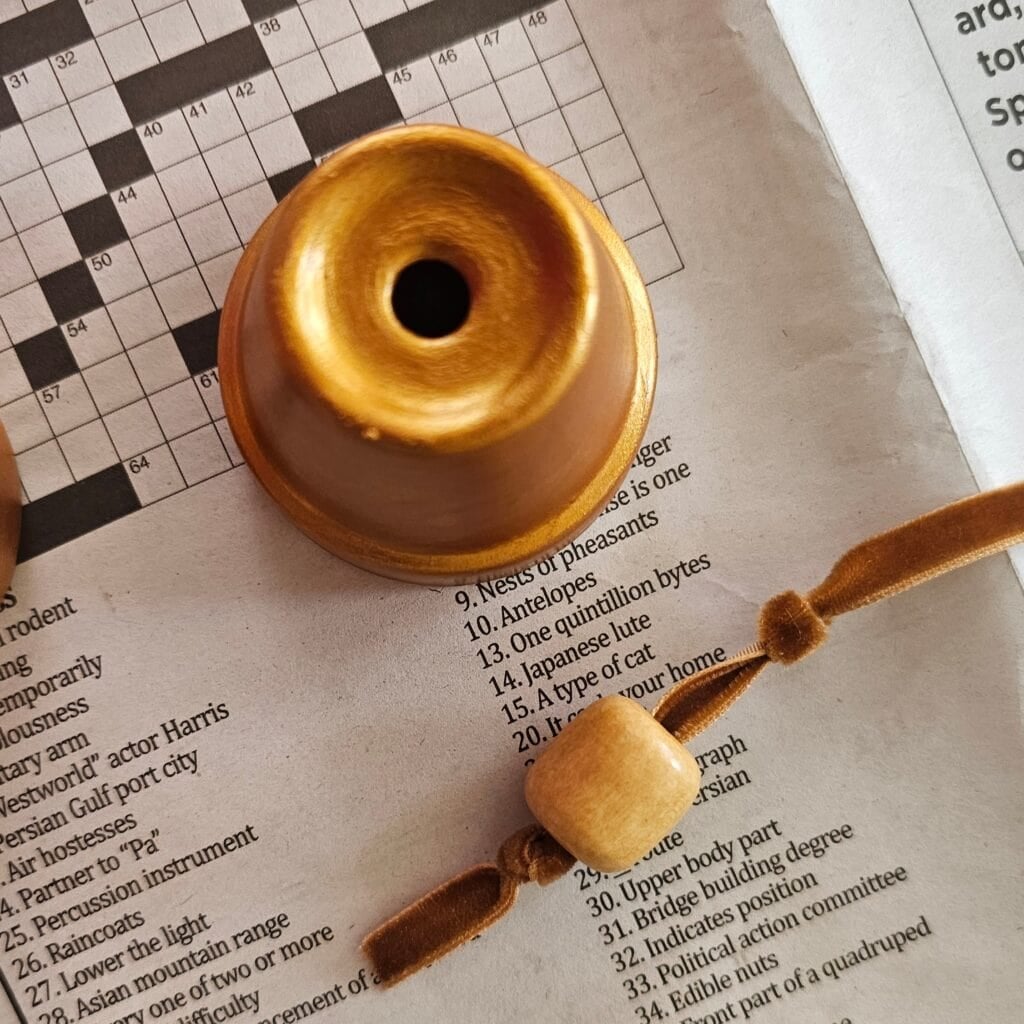
Cut three lengths of narrow ribbon. Tie a wooden bead securely near one end of each ribbon. The bead will hang inside the terracotta pot and act as the clapper.
Choose a bead large enough to strike the sides of the pot but small enough to move freely. Make a firm knot beneath the bead so it cannot slip off.
If you are using actual bells, you can skip this step.
Step 4: Thread the Ribbon Through the Pots
Feed the loose end of each ribbon through the drainage hole in the bottom of a terracotta pot. Pull the ribbon through until the bead hangs inside the pot.
Adjust the bead so it rests close enough to the sides to make a gentle sound when moved. Tie a knot above the pot to keep everything in place.
Step 5: Add Flowers and Natural Decorations
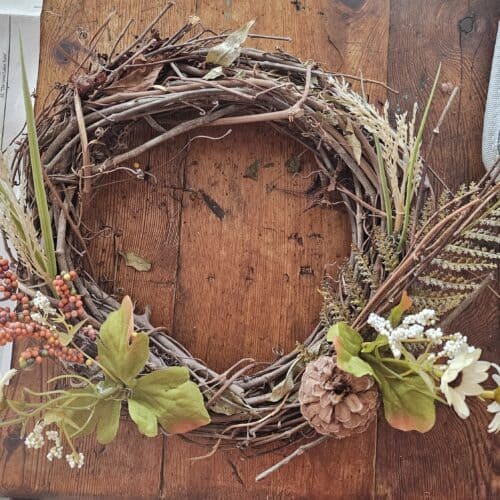
Arrange artificial or completely dried flowers around one side or along the bottom of the wreath. Once you like the placement, attach them with hot glue, floral wire, or strong twine.
For a fall version, consider using dried yarrow, strawflowers, goldenrod, grasses, seed heads, small evergreen sprigs, or artificial autumn flowers.
Step 6: Attach the Bells to the Wreath
Tie the three ribbons to the bottom of the grapevine wreath. Hang the pots at slightly different lengths so they do not crowd one another.
Before tightening the knots completely, hold up the wreath and gently shake it. Adjust the ribbons until the beads can move and tap against the pots. Once you like the arrangement, tighten the knots securely.
Step 7: Add More Ribbon
If you want, you can cut several additional pieces of ribbon in different lengths. Tie them along the bottom of the grapevine wreath around the three bells.
Mix solid, patterned, velvet, lace, and natural-fiber ribbons for a layered look. There is no right or wrong way to tie the ribbons. Let them overlap and hang naturally.
Step 9: Add a Hanging Loop
Tie a strong piece of ribbon, twine, or cord to the top of the wreath. Make the loop large enough to fit over a hook, nail, or doorknob.
Hold up the wreath and check that everything hangs evenly. Adjust the bells, ribbons, or flowers if one side feels too heavy.
Step 10: Hang and Enjoy
Hang your finished witches bells inside a door, on a wall hook, or beneath a well-covered porch.
I plan to hang mine on the door of my nature and art studio. I love the thought of hearing their soft sound as I enter the space to write, create, and work with the natural materials I gather around the property.
Keep the wreath protected from rain and dampness. Terracotta, dried flowers, ribbon, and dried oranges will last much longer when displayed indoors.
Adding an Intention to Your Witches Bells
Because the witches bells are handmade, you can build your own meaning into each part of the project. You might paint a word on each pot, choose ribbons in meaningful colors, or add plants connected with home and protection.
Before hanging the bells, take a quiet moment to think about what you want your home or creative space to hold. It might be peace, inspiration, safety, welcome, or a stronger connection to the land.
May this be a place of peace, creativity, and welcome. May all who enter do so with good intentions.
An elaborate ritual is not necessary. The time and attention you put into making the piece are meaningful on their own.
A Simple Autumn Craft for the Home
What I like most about this project is that the materials are inexpensive and easy to personalize. Miniature terracotta pots become bells, wooden beads become clappers, and a plain grapevine wreath becomes something completely unique.
It is also a craft that can change with the seasons. You can use flowers and green ribbons in spring, herbs and bright colors for midsummer, or evergreens and deep red ribbon for winter. Most of all, have fun with it.
More to Explore
If you enjoyed making these witches bells, you may also enjoy these nature-inspired and seasonal crafts:
Don't Forget to Subscribe to Our Newsletter
Are you passionate about connecting with nature and exploring the world of herbal remedies? Join our community by subscribing to our weekly newsletter! As a subscriber, you’ll gain exclusive access to our members-only freebie and resource library, packed with valuable guides, recipes, and tips for living a more natural and sustainable lifestyle, closer to nature.