The Outdoor Apothecary is reader-supported. When you buy through links on our site, we may earn an affiliate commission. Learn more
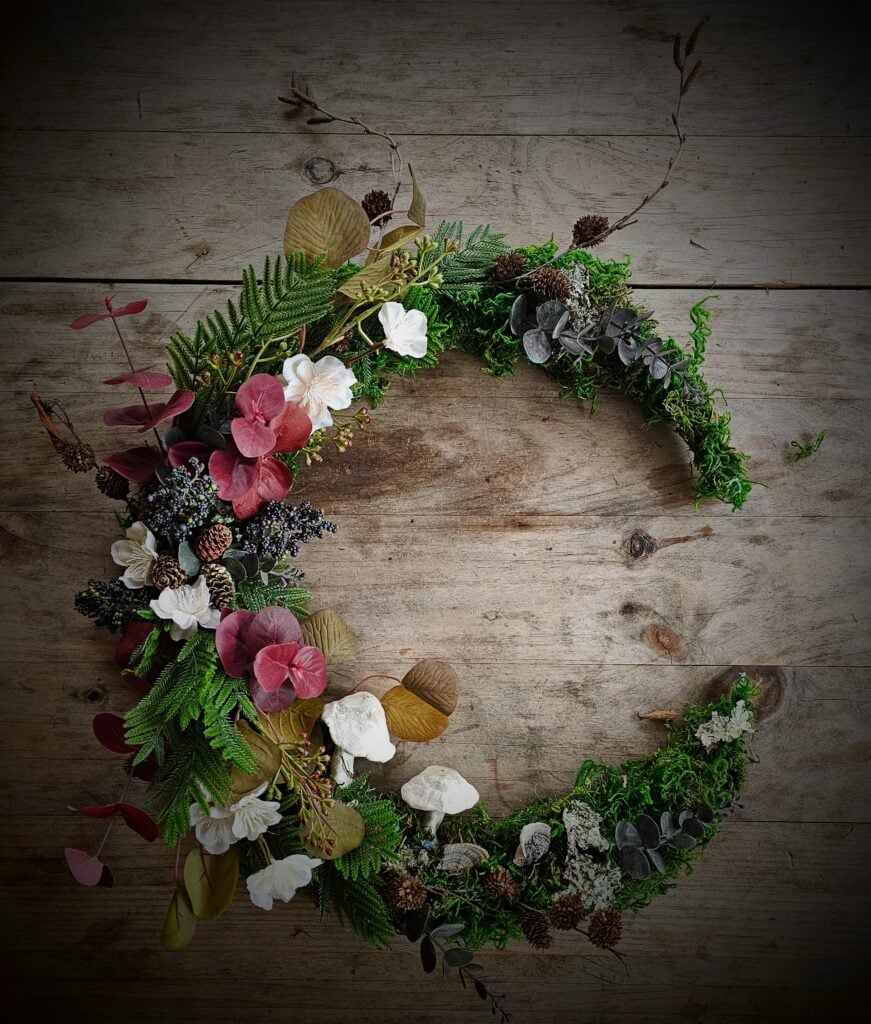
I have a dear friend who loves anything made with nature—she’s a lot like me in that way! She adores all things witchy and natural, so every year I challenge myself to craft something special for her Yule gift. This year, after some inspiration and a bit of creative brainstorming, I landed on the idea of making a crescent moon wreath. To make it even more enchanting, I decided to add tiny air-dry clay mushrooms for a touch of whimsy.
I loved putting this project together, from foraging moss and lichens to carefully arranging the flowers and embellishments. It turned out so beautifully, and I just know my friend will be thrilled with it. There’s something so satisfying about crafting a gift with your own hands, especially when it’s infused with the magic of nature and the spirit of the season.
Creating a crescent moon wreath is such a fun and rewarding project, whether you’re making it as a gift, a seasonal decoration, or a unique piece of year-round decor. It’s a perfect way to bring natural, whimsical charm into any space, and you can customize it however you like. Here’s everything you need to know to make your own!
Crescent Moon Wreath Materials List
Here’s what you’ll need to gather before you start:
- Wire wreath frame (a circular frame works; you’ll modify it to make the crescent moon shape)
- Wire snips (for cutting the frame and floral wire)
- Packing tape or heavy-duty tape (to shape and secure the ends)
- Wide burlap ribbon (for wrapping the frame and creating a base)
- Hot glue gun and glue sticks
- Green floral wire
- Scissors
- Artificial or dried flowers (choose blooms and stems you love—get creative!)
- Mosses and lichens (a mix of store-bought and foraged moss works beautifully)
- Air-dry clay mushrooms or other whimsical embellishments (optional)
- Pinecones, seed pods, feathers, or other natural elements (optional)
Step-by-Step Instructions
Now that you’ve gathered your materials, it’s time to dive into the creative process! Making a crescent moon wreath is easier than it looks and allows plenty of room for personal expression. Whether you’re crafting it as a gift, seasonal decor, or a unique addition to your home, these step-by-step instructions will guide you through the process. From shaping the frame to adding whimsical embellishments, you’ll learn exactly how to create a stunning wreath that’s bursting with natural charm and your own creative flair. Let’s get started!
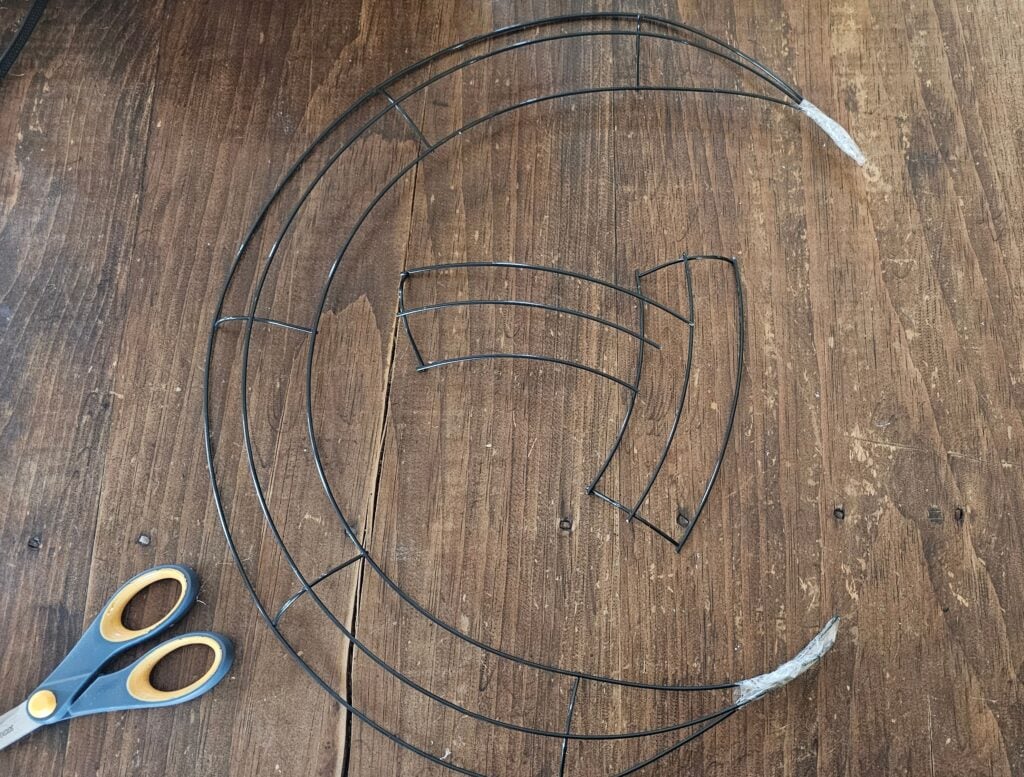
Step 1: Shape the Crescent Moon Base
- Start with a circular wire wreath frame. Using wire snips, cut out a section to form the crescent moon shape.
- Gently bend the ends inward to create points. Secure these ends with packing tape to hold the crescent moon form.
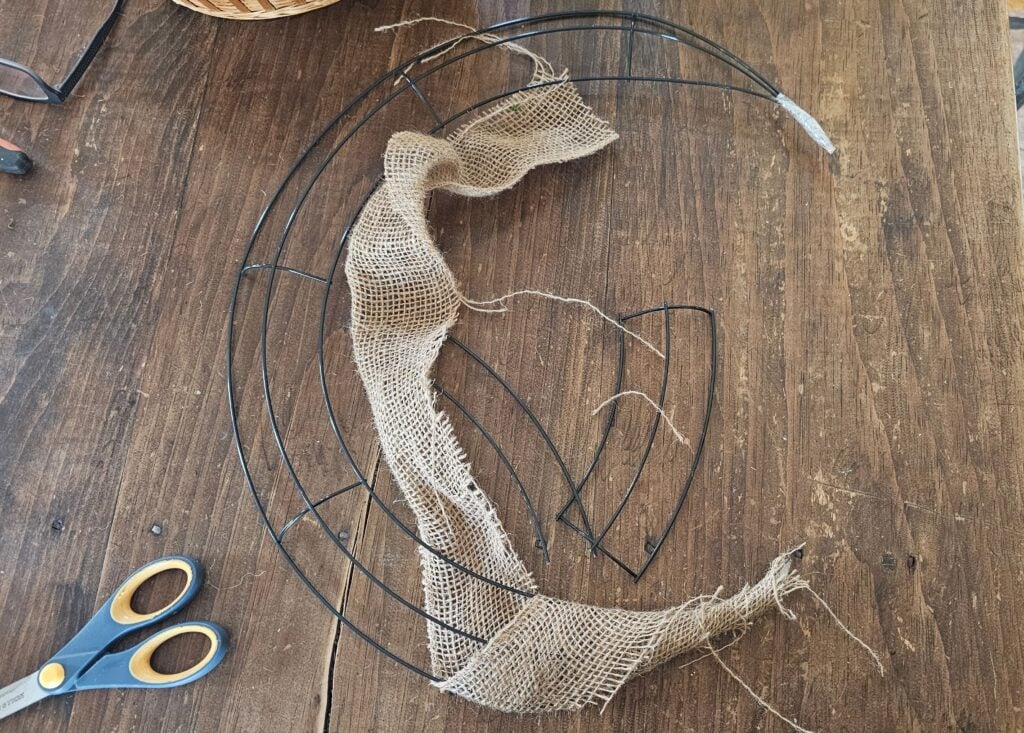
Step 2: Wrap the Frame
- Take your wide burlap ribbon and wrap it tightly around the entire frame. This gives you a sturdy surface to work on and helps the moss and decorations adhere better.
- Overlap the ribbon slightly as you go to ensure full coverage. Secure the ends of the burlap with hot glue or tape.
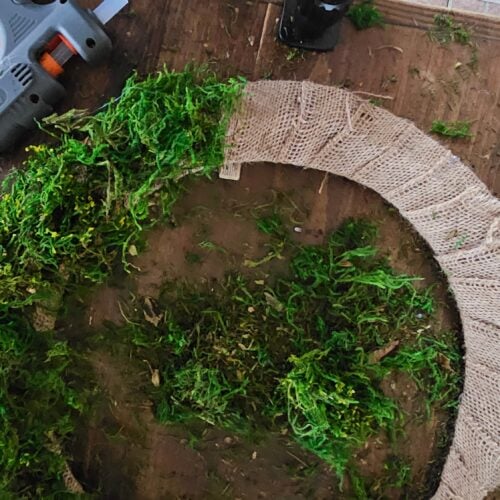
Step 3: Add Moss
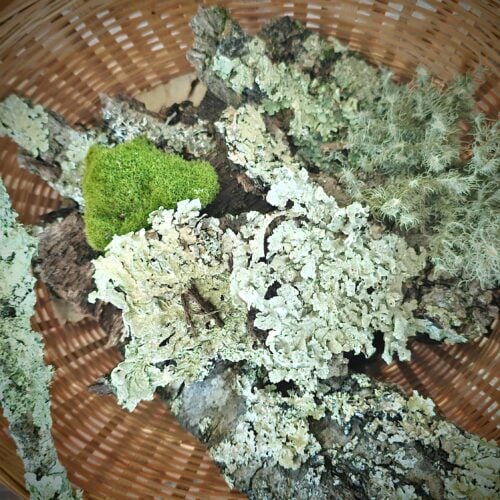
- Using a hot glue gun, carefully attach moss to the burlap-wrapped frame. Cover the surface entirely for a lush, natural look.
- I used a combination of store-bought moss and foraged pieces, including lichens like usnea, for extra texture.
- Work in small sections, pressing the moss firmly onto the glue as you go.
Step 4: Secure the Moss
- Once the moss is glued on, take green floral wire and wrap it around the frame at 1–2 inch intervals. This provides extra security and ensures the moss stays in place over time.
- Twist the ends of the wire to secure it, then tuck them into the moss to keep them hidden.
Step 5: Add Decorative Elements
Now for the fun part—decorating!
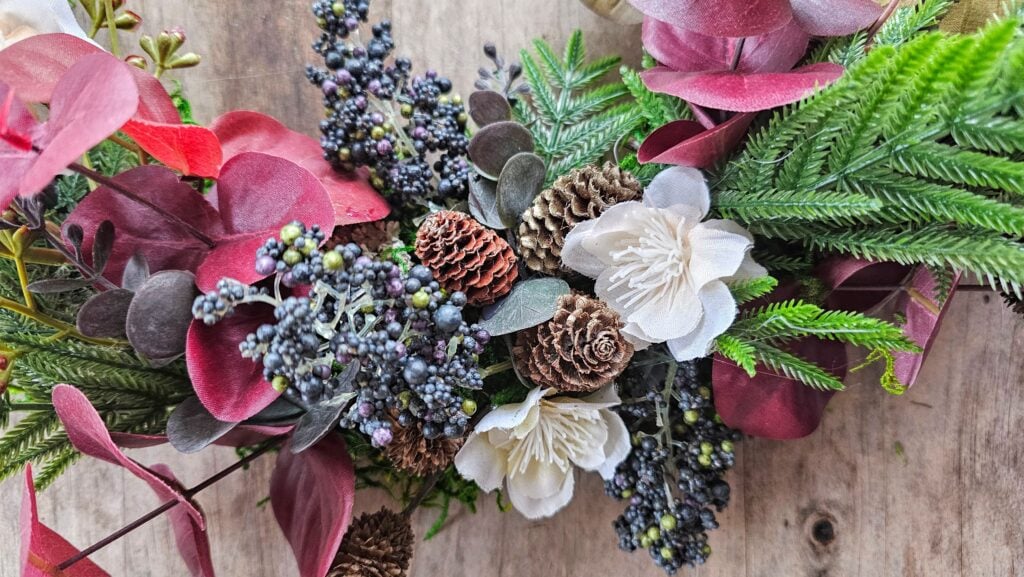
- Start with your larger items, such as dried botanicals, artificial flowers, and stems. I found some beautiful artificial stems at Michaels, but feel free to use any flowers or natural elements that inspire you.
- I used a combination of foraged materials and store-bought accents to create a design that felt personal and unique.
- To attach the botanicals, start by slipping the stems under the green floral wire you previously wrapped around the moss-covered frame. This wire not only secures the moss but also provides a perfect anchor for your decorative pieces. Once the stems are in place, use hot glue to secure them for added stability.
- Continue layering and overlapping your decorations, focusing on creating a balanced, natural look. Mix textures and colors to add depth and dimension, allowing your creativity to shine as you bring your crescent moon wreath to life!
Step 6: Add Whimsical Touches
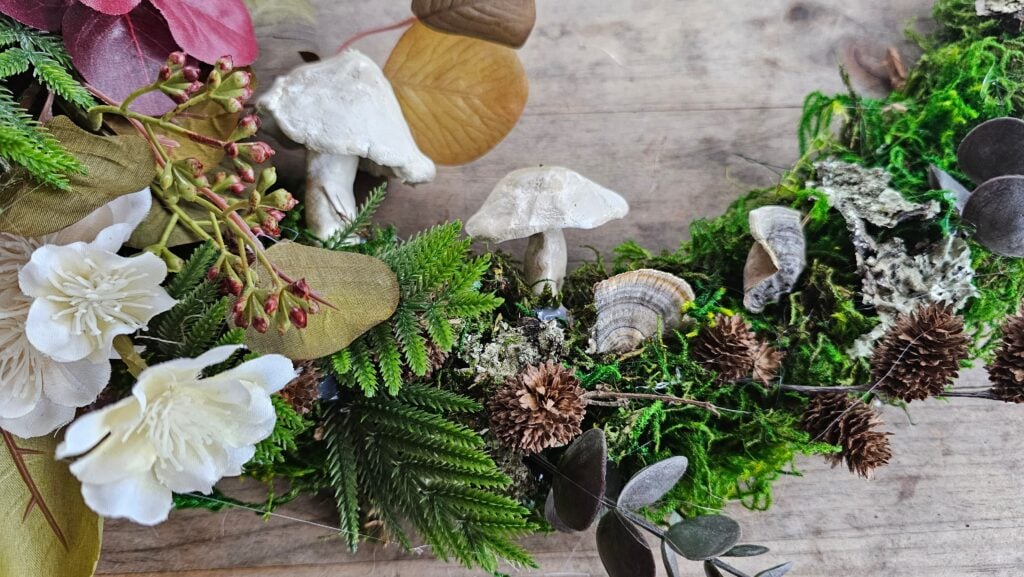
- For a touch of witchy whimsy, I added air-dry clay mushrooms that I made ahead of time. Attach these with hot glue in strategic spots to give your wreath a magical feel.
- You can also include pinecones, real fungi, feathers, seed pods, or any other embellishments you love.

Step 7: Final Touches
- Step back and assess your wreath. Add any final embellishments to balance the design or fill in empty spaces.
- Once you’re happy with the look, make sure all the elements are securely attached.
Tips for Success
- Foraged elements, like moss and lichens, add a personal, natural touch, but ensure they’re clean and dry before using.
- Experiment with colors and textures—mixing dried botanicals with artificial elements can create a visually stunning result.
- If you plan to hang your wreath outdoors, consider using weather-resistant materials or treating it with a sealant.
Congratulations! Your crescent moon wreath is now complete. Hang it on your door, wall, or any space that could use a touch of nature-inspired charm. This craft serves as a creative outlet and a beautiful way to connect with the natural world, infusing your surroundings with seasonal magic.
If you enjoyed this project, I invite you to explore more nature-inspired crafts that celebrate the beauty of the outdoors:
How to Make Waxed Leaves for Fall Crafts: Preserve autumn leaves to use in various craft projects or for display.
How to Make Whimsical Air Dry Clay Mushrooms: Create charming clay mushrooms to add a touch of whimsy to your decor.
Branch Weaving: Create a Unique & Whimsical Nature Craft in a Weekend: Learn the art of branch weaving to craft unique, nature-inspired pieces.
How to Make a Dried Wild Flower Wreath in 6 Easy Steps: Design a beautiful wreath using dried wildflowers collected throughout the year.
How to Make Salt Dough Ornaments or Gift Tags: Craft personalized ornaments or gift tags with simple ingredients.
How to Make a Wreath in 6 Easy Steps: A Wild, Winter Solstice Symbol: Create a wild, foraged evergreen wreath to celebrate the winter solstice.
These projects offer wonderful opportunities to bring the beauty of nature into your home and make thoughtful, handcrafted gifts. Happy crafting!
As an Amazon Associate, I earn from qualifying purchases.

